


In retouching you see this quite frequently, whether you’re using
seamless paper, vinyl, a fabric hanging or a purpose built infinity
cove, it’s going to get dirty. You have a couple of options, one is to
check out some reviews on Amazon for handheld vacuum cleaners and have
your assistant scoot around with it between shots.
The other more sensible option, which we’ll cover here, is to solve it in post, in this case using Adobe Photoshop. It isn’t difficult of course to clone out the odd scuff mark, but when you have hundreds of dirt marks or creases you need a slightly more heavy duty solution, and simply blurring can bring its own problems.
In this case I’ve already tidied up the floor, now it’s time to clean up the background.

Image copyright: Simon Newlyn
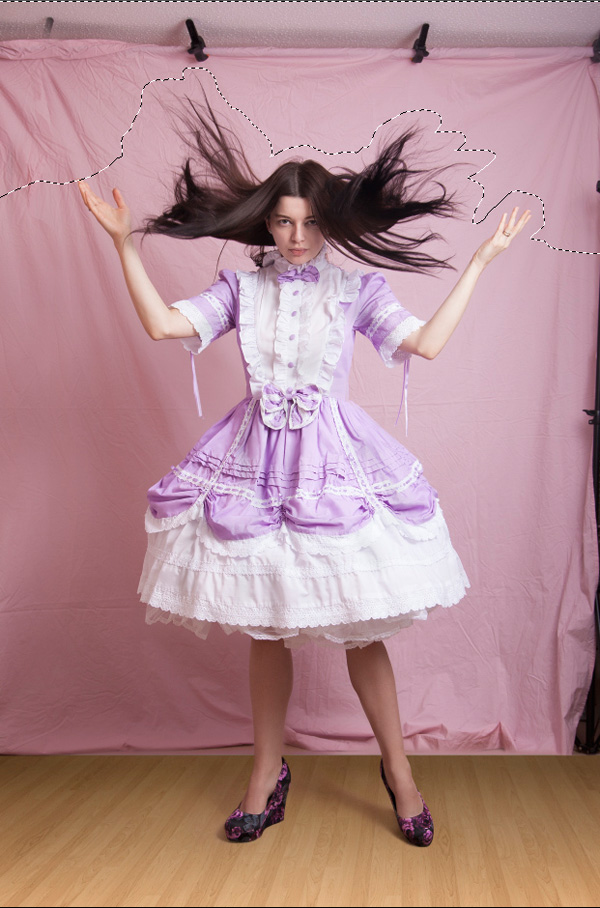
In some cases, a Crop will solve the edge problems, but in the interest of completeness I’m going to cover a method of extending the background over the problem areas when there are shadows and gradients to consider.
Make a selection along the edge, keeping close to the model to give us plenty of background to work with. We’re going to extend this piece to cover the problem area to the left.

Hit Cmd/Ctrl+C to copy the area and Cmd/Ctrl+V to paste the selection onto a new layer;

Now choose Edit>Free Transform (Cmd/Ctrl+T) and stretch the selection out to the left to cover the problem area. This will pull the right side of the selection with it a little so you may need to pull the right side back a touch.

Add a black Mask to the layer and we’re ready to brush in the areas we need.

With a large, very soft white Brush (0% hardness) paint over the problem area. This should blend nicely into the existing background. When you’re done, select the next part to cover and repeat the process.
Here I’ve selected the top, I’ll Edit>Copy Merged (Shift+Cmd/Ctrl+C), then paste the selection into a new layer (Create New Layer, Cmd/Ctrl+V), stretch it mask it and brush it in as before.
Here’s the result so far with each side carefully brushed in. You’ll note that this particular shot demonstrates a common problem well, sometimes an object or part of the model is too close to the edge as with her hair, and this gives us a hole. we have a similar problem around the legs.

There’s a really simple solution for this, just start a new layer and with Clone Stamp and/or Healing Brush set to Current & Below, clone out the problems. On this same layer, with a large healing brush, you can remove the larger wrinkles;

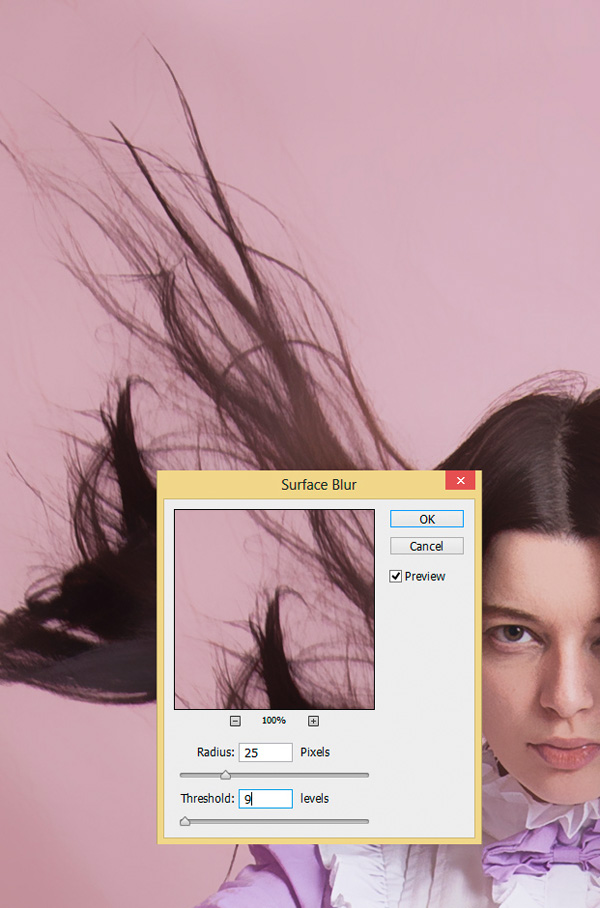
Now here’s the part where we remove the dirt and creases, if we get in close to this example you can see there are many;

To combat this we’ll need to stamp a new merged layer (Shift+Cmd/Ctrl+Opt/Alt+E) and run Filter>Surface Blur. Experiment with the settings with a high enough radius to remove the creases, but not too high as to blur the edges of the model;
Add a black mask to this layer as before, and using a white brush on the mask paint to bring back the blur where needed, getting close to the edges of the model;
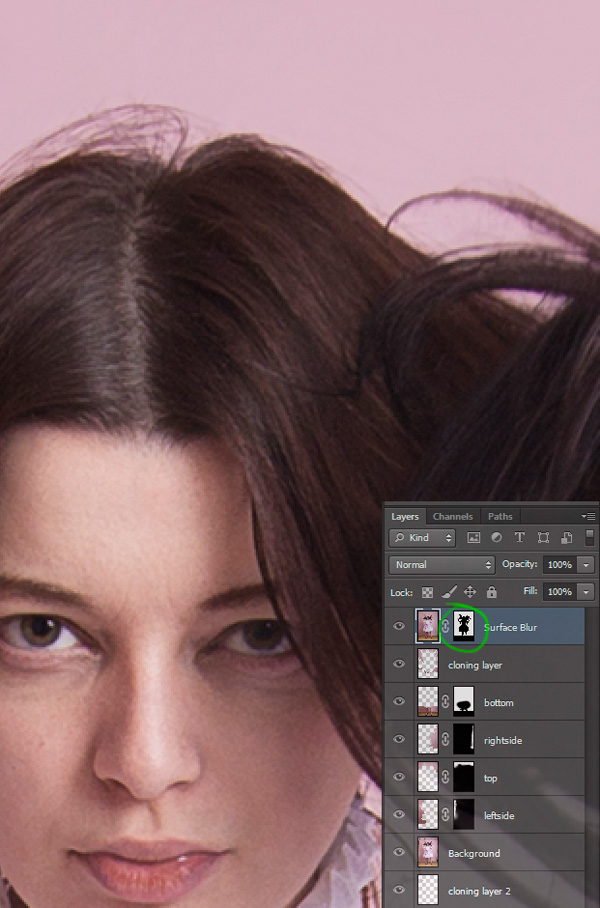
Now the eagle-eyed amongst you will have spotted that the grain no longer matches when viewed closely. There’s noise in the foreground model and none at all in the background. This is always a worthy consideration if you want your retouching to stand up to scrutiny, so we’re going to click on the layer tab (instead of the mask) and select Filter>Noise>Add Noise. In this case we’re only going to add 0.6 percent Uniform Monochromatic, but this may be more or less depending on circumstance.

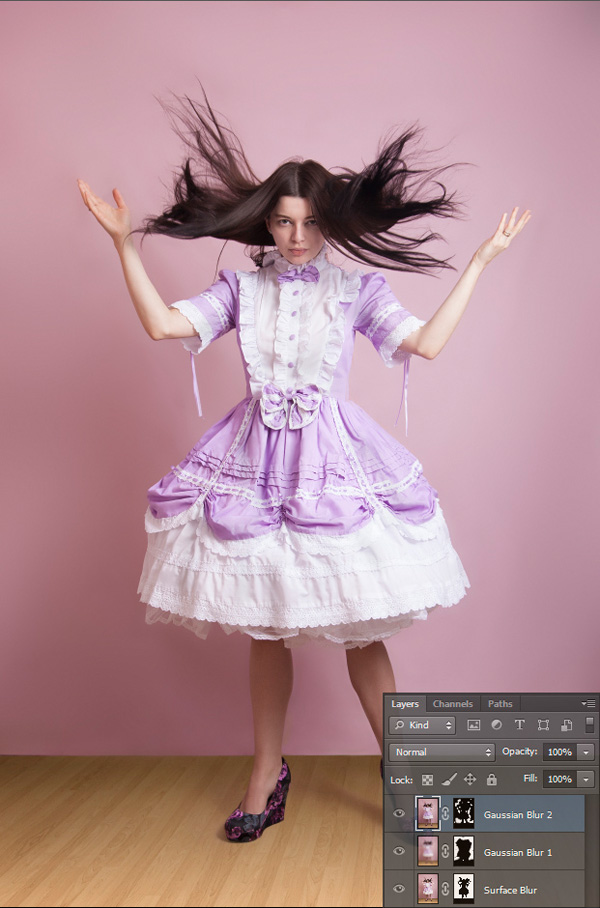
If we zoom out look at the shot now it’s a lot neater than when we started, and as we’ve cleared up the background close to the model we can afford a slightly heavier handed method towards evening out the edges, so we’re about to use Filter>Gaussian Blur.

Stamp a new merged layer (Shift+Cmd/Ctrl+Opt/Alt+E), and select the Gaussian Blur Radius according to how much you want to smooth out the surrounding background. In this case I’ve used a Radius of 80; Don’t forget to add the same Noise to this layer, using the steps as before.
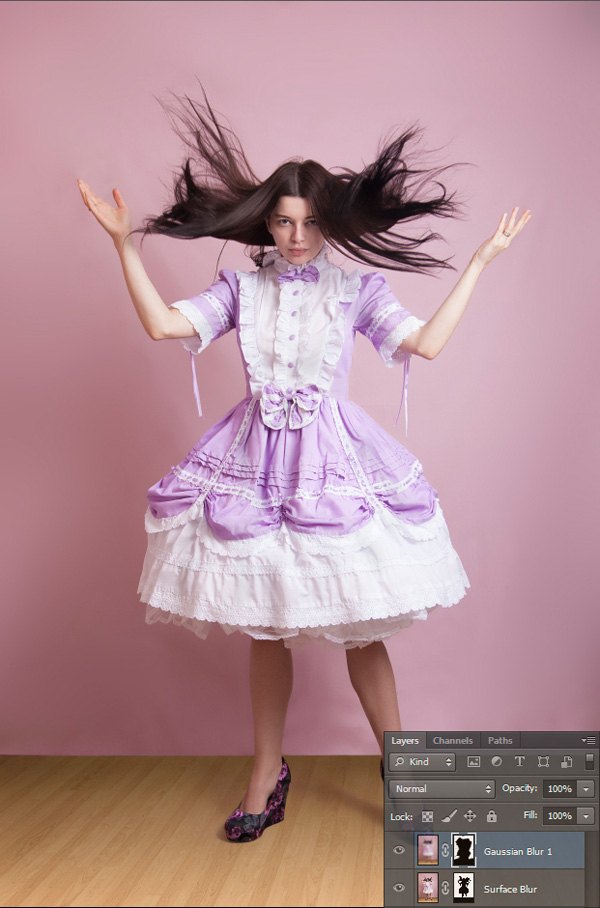
Note on the mask, I’ve kept a good distance from the model to avoid colour bleed. I think we’d benefit in this instance from blurring the areas closer to to her a little more so I then stamped another merged layer, and added a lower Gaussian Blur of 20 and repeated the mask painting, this time note on the mask that I’ve just painted over remaining problem areas and been able to get a bit closer to the model;
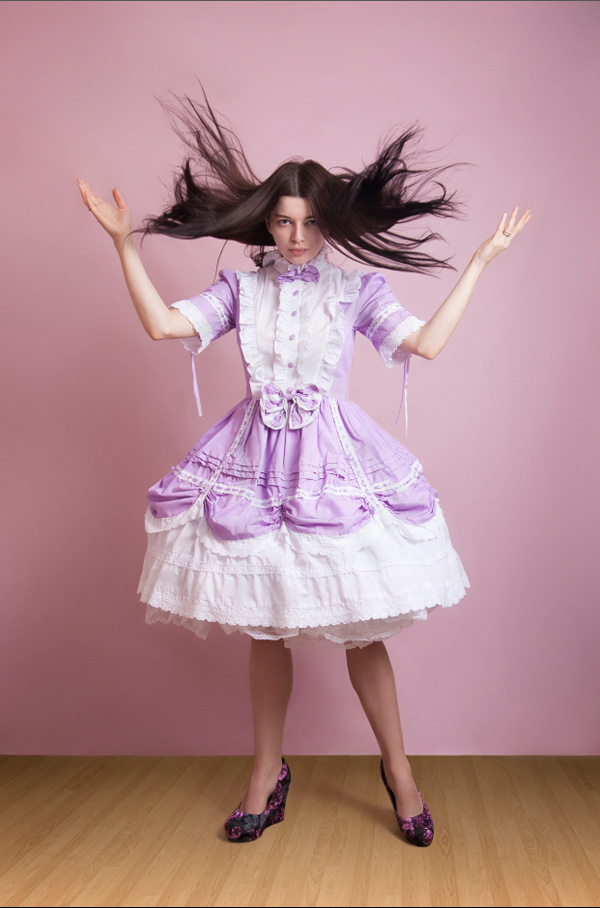
Not bad right? As a finishing touch I’m just going to add a vignette and I think we’re done!
The other more sensible option, which we’ll cover here, is to solve it in post, in this case using Adobe Photoshop. It isn’t difficult of course to clone out the odd scuff mark, but when you have hundreds of dirt marks or creases you need a slightly more heavy duty solution, and simply blurring can bring its own problems.
In this case I’ve already tidied up the floor, now it’s time to clean up the background.
Image copyright: Simon Newlyn
In some cases, a Crop will solve the edge problems, but in the interest of completeness I’m going to cover a method of extending the background over the problem areas when there are shadows and gradients to consider.
Make a selection along the edge, keeping close to the model to give us plenty of background to work with. We’re going to extend this piece to cover the problem area to the left.
Hit Cmd/Ctrl+C to copy the area and Cmd/Ctrl+V to paste the selection onto a new layer;
Now choose Edit>Free Transform (Cmd/Ctrl+T) and stretch the selection out to the left to cover the problem area. This will pull the right side of the selection with it a little so you may need to pull the right side back a touch.
Add a black Mask to the layer and we’re ready to brush in the areas we need.
With a large, very soft white Brush (0% hardness) paint over the problem area. This should blend nicely into the existing background. When you’re done, select the next part to cover and repeat the process.
Here I’ve selected the top, I’ll Edit>Copy Merged (Shift+Cmd/Ctrl+C), then paste the selection into a new layer (Create New Layer, Cmd/Ctrl+V), stretch it mask it and brush it in as before.
Here’s the result so far with each side carefully brushed in. You’ll note that this particular shot demonstrates a common problem well, sometimes an object or part of the model is too close to the edge as with her hair, and this gives us a hole. we have a similar problem around the legs.
There’s a really simple solution for this, just start a new layer and with Clone Stamp and/or Healing Brush set to Current & Below, clone out the problems. On this same layer, with a large healing brush, you can remove the larger wrinkles;
Now here’s the part where we remove the dirt and creases, if we get in close to this example you can see there are many;
To combat this we’ll need to stamp a new merged layer (Shift+Cmd/Ctrl+Opt/Alt+E) and run Filter>Surface Blur. Experiment with the settings with a high enough radius to remove the creases, but not too high as to blur the edges of the model;
Add a black mask to this layer as before, and using a white brush on the mask paint to bring back the blur where needed, getting close to the edges of the model;
Now the eagle-eyed amongst you will have spotted that the grain no longer matches when viewed closely. There’s noise in the foreground model and none at all in the background. This is always a worthy consideration if you want your retouching to stand up to scrutiny, so we’re going to click on the layer tab (instead of the mask) and select Filter>Noise>Add Noise. In this case we’re only going to add 0.6 percent Uniform Monochromatic, but this may be more or less depending on circumstance.
If we zoom out look at the shot now it’s a lot neater than when we started, and as we’ve cleared up the background close to the model we can afford a slightly heavier handed method towards evening out the edges, so we’re about to use Filter>Gaussian Blur.
Stamp a new merged layer (Shift+Cmd/Ctrl+Opt/Alt+E), and select the Gaussian Blur Radius according to how much you want to smooth out the surrounding background. In this case I’ve used a Radius of 80; Don’t forget to add the same Noise to this layer, using the steps as before.
Note on the mask, I’ve kept a good distance from the model to avoid colour bleed. I think we’d benefit in this instance from blurring the areas closer to to her a little more so I then stamped another merged layer, and added a lower Gaussian Blur of 20 and repeated the mask painting, this time note on the mask that I’ve just painted over remaining problem areas and been able to get a bit closer to the model;
Not bad right? As a finishing touch I’m just going to add a vignette and I think we’re done!
