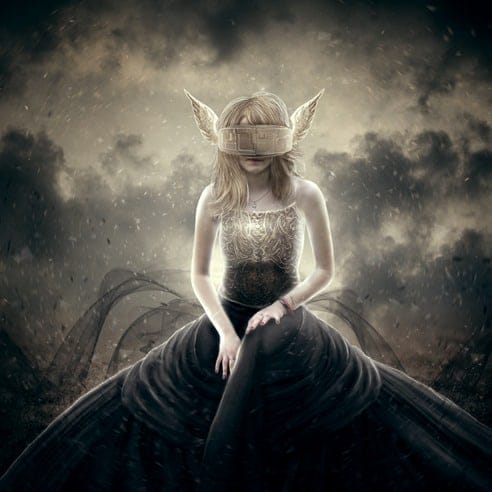
What you’ll be creating
Valkyrie is one of a host of female figures who choose those who may die in battle and those who may live. To create it you will start from making background. Next, you will add model with all props of goddess. Finally, you will finish it up with nice particles effect and coloring. You’ll need Photoshop CS5 or newer to follow this tutorial.
Tutorial Resources
- Black wings – actress stock
- Misc Objects 018 – pixelchemist stock
- Water Background – fantasystock
- Gothic Bridal 4 – hellonlegs
- Particles Brush PSD – rafarod
- Battlefield Skies UNRESTRICTED – missstark
- Autumn coastal hill – rgbstock
- Hair Stocks – cindysart
- Particles pack 25 free images – mediamilitia.com
- Dumitrescu Iulian 3 – tasper
Step 1
Start from creating 1400x1400px canvas . Place Autumn coastal hill at the center of the image.

Step 2
From top menu choose Filter > Blur > Gaussian blur. I used 7,6 px blur.

Step 3
As you can see, Smart filters can be masked by you. For do that you should just click white canvas in the “Smart Filter” line.

Pick big, soft round brush and decrease opacity to 60%. Erase bottom of the hill, as is shown. You should leave blur on edges – it will give depth of field on image.

By clicking white canvas of Smart Filter with alt holding, you can edit only mask. My results:

Step 4
Now you will adjust the hill stock. Click on shortcut for make Brightness/Contrast adjustment layer. Set it as shown:

Step 5
For creating highlights on background you should add again the same adjustment layer. Set it as shown.

Then mask adjustment layer as is shown. You can do this by clicking white canvas on this layer. I used big soft brush. Try to leave center and top of the layer.

Step 6
Next, add Hue/Saturation layer. With this adjustment, you can better blend hill and sky layer.

Step 7
Place sky stock. Add mask to this layer and use gradient tool to mask it, or play with big soft brushes. As you wish :).

Step 8
Add Hue/Saturation layer. Decrease saturation. Make it clip by RMB > Create clipping mask.

Step 9
At the end of making background add adjustment layer (without clipping mask) with Brightness and Contrast. Set it as shown.

Step 10
Then on mask of adjustment layer use radial gradient and erase center of the layer.

Step 11
Now place model stock and mask background. Don’t be afraid of the perspective in this step. You will add gown soon, so keep calm :).

