


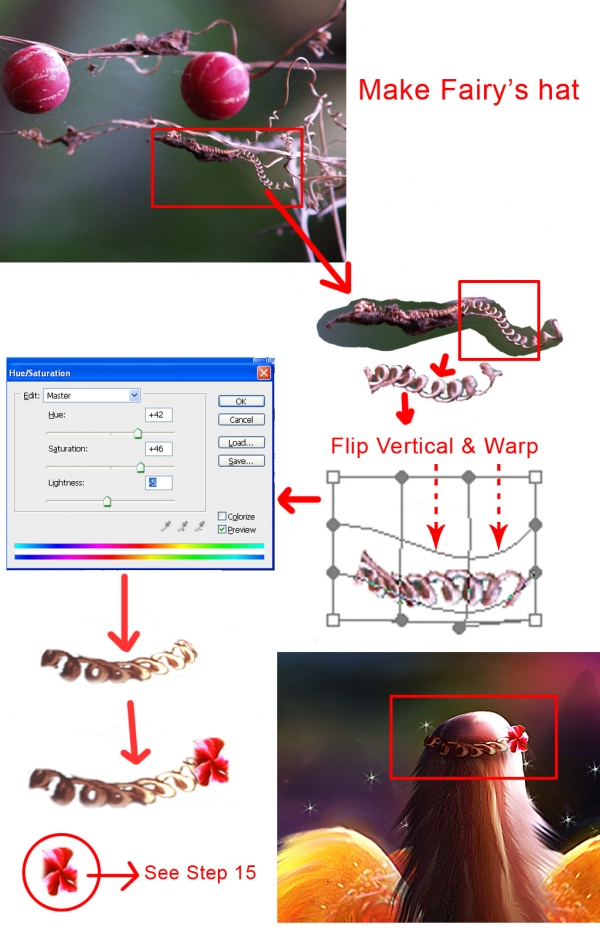
This step explain you how to make fairy's hat from source.

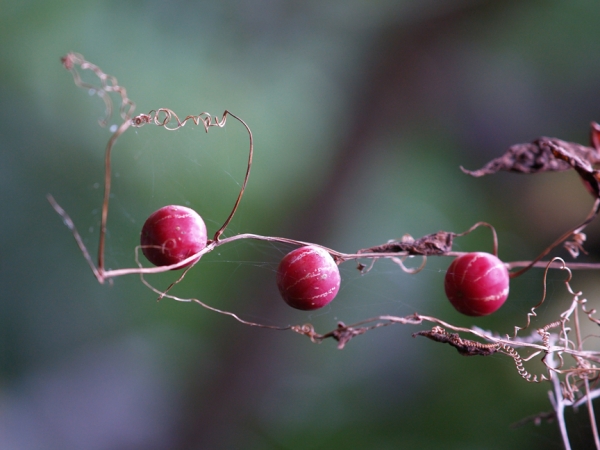
Step 1
This is the source image from "Red Berries" contest.
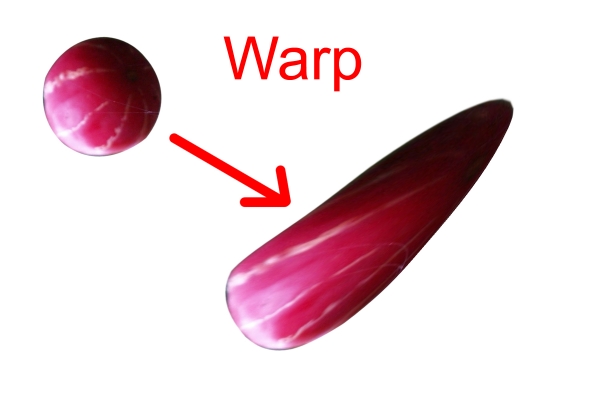
Step 2
First we create wings from the source image.Cutout the Berries from the source image and use Warp tool (Edit -> Transform -> Warp) to change it like the image below.
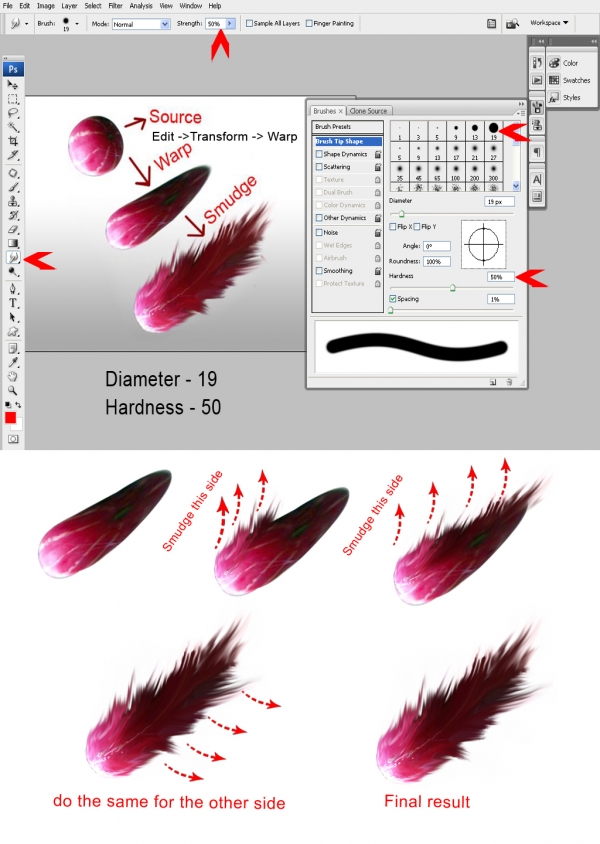
Step 3
Now select Smudge tool and set the values below and smudge around the edges of the source.
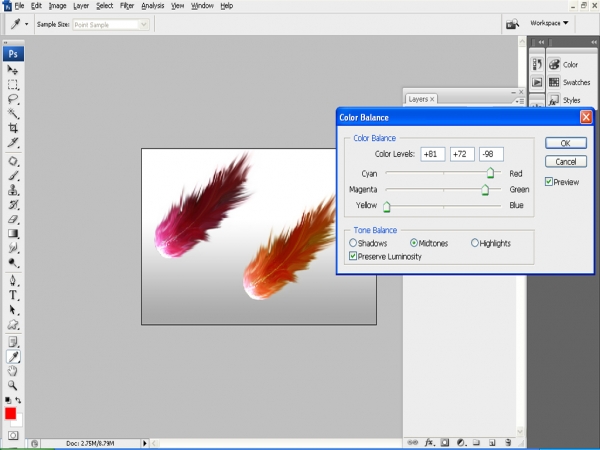
Step 4
Now color balance the smudged object.
Step 5
Now again use the warp tool and adjust the wing shape and Hue/saturate the image like below .

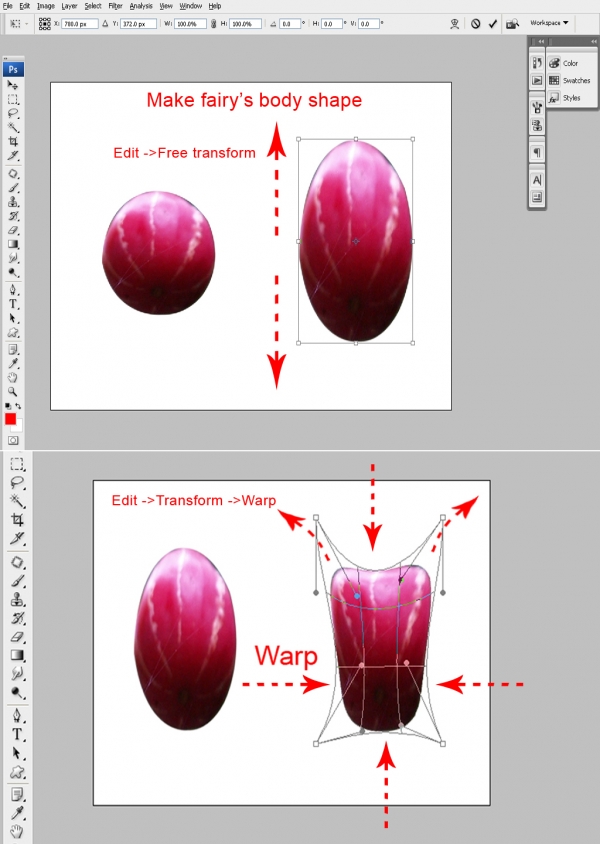
Step 6
The wings part is over.Now we make a fairy's body.First select berries and transform it and then use the warp tool to adjust the shape.The arrows indicates the direction how to warp the source image.
Step 7
This step explain you how to make fairy's hat from source.
Step 8
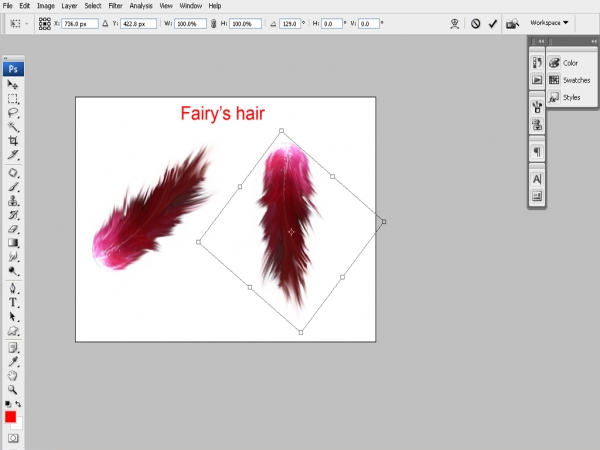
Now create fairy's hair.Select the wings image (step 3) and transform it like below.
Step 9
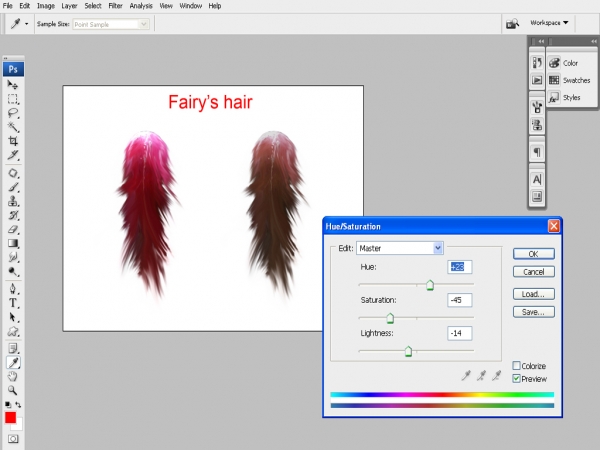
Now goto layer ->New Adjustment Layer -> Hue/saturation or contl + U short cut key and adjust the colors.
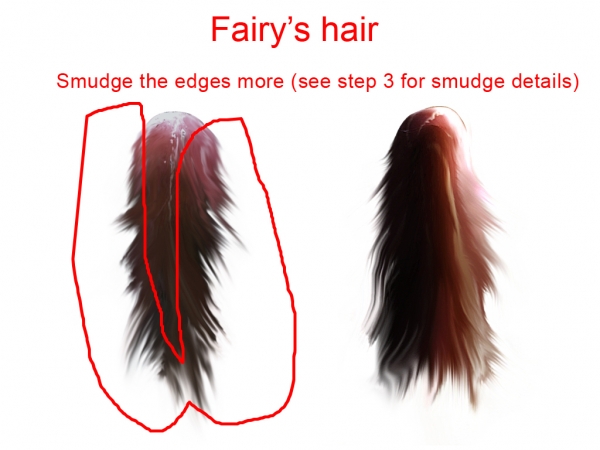
Step 10
Use Smudge tool again same value in step 3 to smudge it like the image below.
Step 11
Now create rock.See the details in the image below.

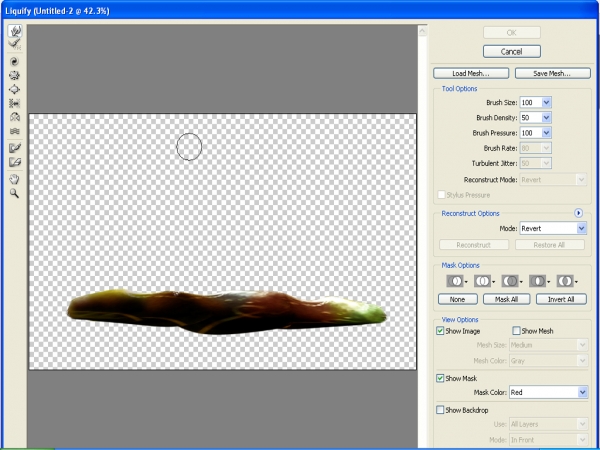
Step 12
Use Filter -> Liquify and adjust it.
Step 13
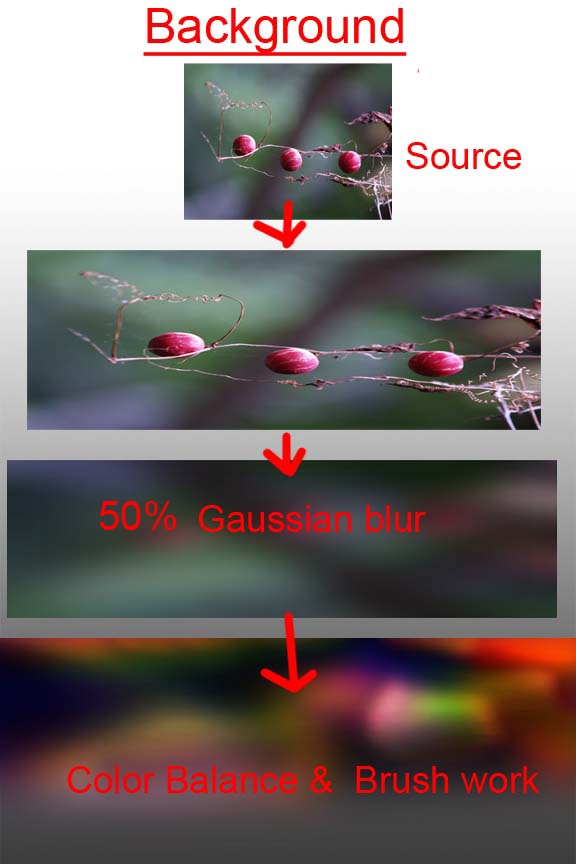
This step shows you to create the background.
Step 14
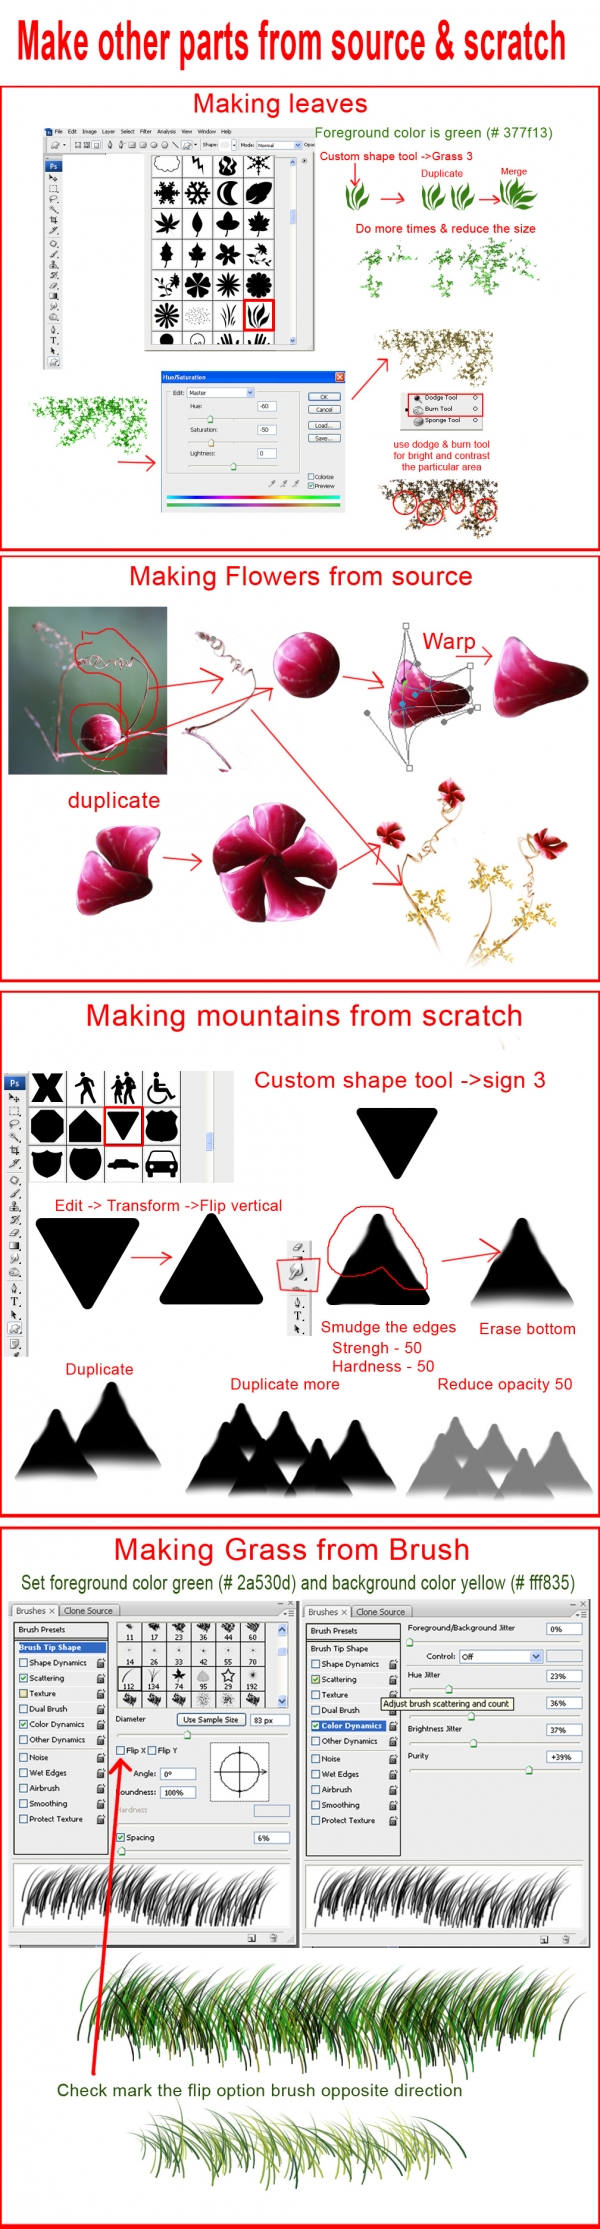
This is the other objects create from source image and scratch.
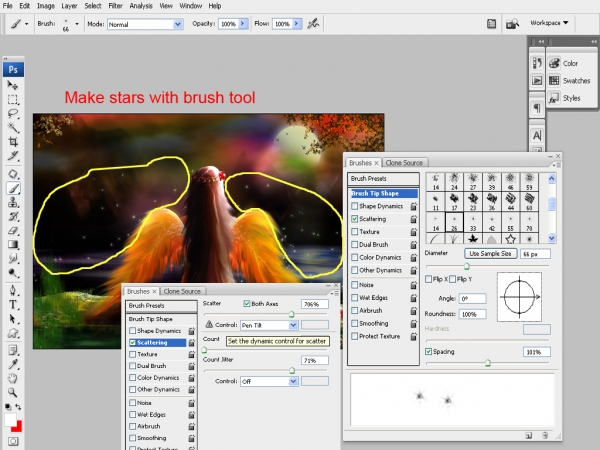
Step 15
Make stars using brush tool.
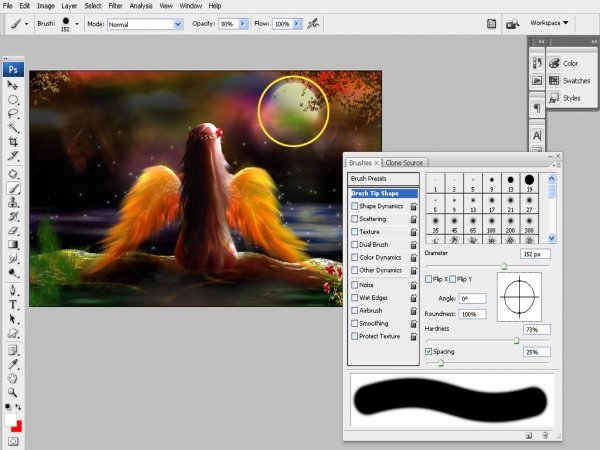
Step 16
Make Moon using brush tool.
Step 17
This is the final image.Hope you enjoyed this tutorial.Good luck!
